Ipe and other hardwoods are extremely dense. The use of some technical grade tools may be required for optimum results. The details on this page serve as an overview of building and handling directives that will help you attain the ideal finish when building your Ipe deck.

Always check with local building regulations and an architect prior to starting construction. Stick to all building codes that pertain to your area. Since there are countless different variables builders may face on an installation job, it is your duty to test the material for viability for your project prior to constructing. Understand all manufacturers' installation guidelines for the individual products used on the project. If any building codes or manufacturers' installation instructions contradict or differ from information provided by DeckWise.com, contact us for authored clarification before beginning your project.
Ipe decking is air dried for exterior use. Air dried Ipe lumber is appropriate for numerous outdoor applications such as decks, siding, benches, docks, play-grounds, flower boxes, or other furniture that resides outdoors.
Ipe decking should be allowed to rest where it will be installed for 7 days before installation in order to get acclimated to your local temperature and moisture levels. Never store the decking directly on the ground, or right on top of a cement surface. DO NOT store the material for over 30 days prior to use without first consulting with a sales rep at DeckWise.com that your storage circumstances are optimal.
The decking ought to be raised at the very least 12" from the ground during acclimation. To assure the bottom boards are properly ventilated, place the decking on top of wooden blocks. DO NOT cover decking material with plastic or a tarp throughout this acclimation time period. Encompassing with a tarp or plastic layer will trap moisture in and cause stability issues. Covering the top of the pile with a layer of plywood to shed the water is advisable. Always keep material dry until installation. Always use wood shims in between layers of boards to permit proper air flow.
DO NOT STORE HARDWOODS IN GARAGE OR ANY OTHER ENCLOSED AREA.
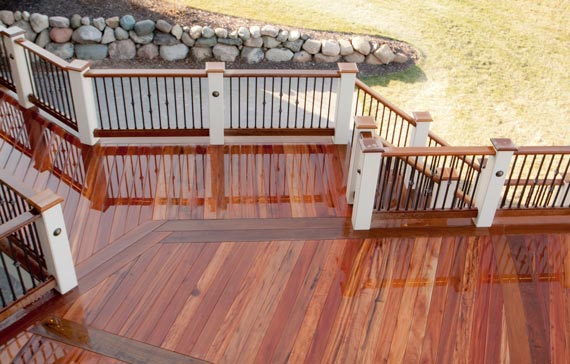
Standard and pregrooved decking both make great choices for outdoor deck and dock construction.

Tongue & Groove Porch Decking is for use beneath covered porches & covered patios only. Installing tongue and groove on a deck without a roof covering the deck surface will cause complications such as allowing excessive water to collect and cause the material to cup, swell, and buckle.
Anytime installing Ipe decking, make sure to set a space between deck boards of 3/32". The variation in gap spacing is to make certain that the decking has room to expand and contract depending on the material used and the atmosphere where it is installed. This also allows for adequate air flow. Average shrinkage is roughly 1/8" on 4" wide boards and 1/4" on 6" wide boards. Shrinkage may fluctuate depending on climate, installation site, and method of use.
Ensure the deck substructure is pitched away from the house to permit for adequate water runoff. We recommend a minimum pitch of a 1/4" per 10 ft. for proper drainage for standard decking. When it comes to Tongue and Groove decking, a significantly more aggressive pitch is encouraged. We highly suggest using a 1/4" per 1 ft. slope.
Framing material should be installed with the crown up (humps up) to assist in water draining off the surface material. Framing lumber can crown 1/8" or greater, and may lead to standing water. Any standing pool of water may cause surface decking to cup. Installing hardwood decking above a concrete foundation is NOT advisable. Hardwood decking should never be installed directly over concrete due to moisture retention. Any kind of hardwood decking installed over a new or aged concrete pad will influence the deck boards to cup and/or crown.
The deck design must allow for appropriate cross ventilation below the deck to guarantee stability, prevent cupping, prevent surface checking, and minimize the natural movement of the wood. We suggest a minimum of 18" of open air under joists along with open sides for appropriate cross ventilation.
If you install skirting around the perimeter of the deck it is crucial that the skirting does not thwart cross ventilation. Do not allow standing water to accumulate under the deck. Make sure that the ground is acceptably sloped underneath the deck to eliminate standing water under the structure.
Due the extremely hard nature of Ipe, premium carbide tipped saw blades are advisable for cutting. Brad point drill bits or fostner bits provide cleaner holes than standard HSS twist bits.
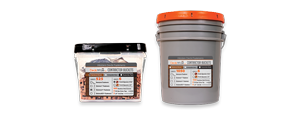
Fresh cuts should really be sealed within 24 hrs with an end grain sealant. To get the job done, DeckWise® offers Ipe Seal® in both quart and 5 gallon applications. Our Ipe Seal® is simply applied with a paintbrush and dries clear. DO NOT apply Ipe Seal® on the walking surface of the decking. Any sealant that happens to get on the decks surface should be wiped off and removed immediately.
Use only stainless steel fasteners to secure hardwood decking or dimensional hardwood. Usage of fasteners or screws crafted of anything other than 305 or higher grade stainless steel will result in unattractive discoloration and blemishes to the wood surrounding the fastener. This may also lead to the fastener corroding and failing prematurely. When attaching deck boards pre-drilling is required, it is important to pre-drill each of your holes with the adequate sized drill bit for your screw size. Failing to predrill can cause the wood to split, which can cause irreparable damage to the deck boards resulting them to become loose over time.
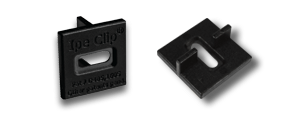
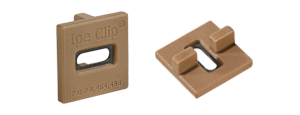
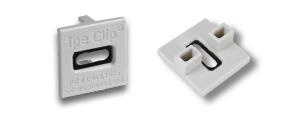
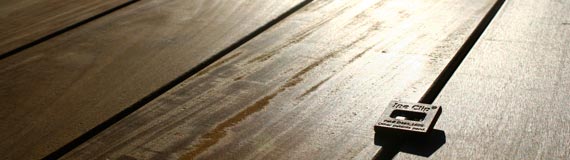
When fastening deck boards, we highly recommend our Ipe Clip® hidden deck fasteners. Ipe Clip® hidden deck fasteners keep the deck surface and finish free of blemishes and imperfections. This deck fastening system also makes it possible for the wood to expand and contract on its width without putting excessive shear pressure on the screws whenever wood expands/contracts. Using Ipe Clip® hidden deck fasteners instead of face screwing can also help keep water from penetrating the surface of the wood. Ipe Clip® fasteners also helps keep the deck surface splinter free. Need help installing the Ipe Clip® on your deck? Learn more here.
Merely because of Ipe's natural denseness and alkaline characteristics, many oil and water based finishes will not dry correctly when applied. We suggest that you test any product on multiple sample boards to determine compatibility. DeckWise® offers and highly recommends the use of Ipe Oil®.
Applying a finish of Ipe Oil® approximately every two years (depending on your local climate) can help preserve the attractive dark brown color. If you come to a decision to let your deck weather, it will become a silvery gray close to teak. We recommend that you add a coat of Ipe Oil® shortly after deck installation, despite the final color desired. This can help make sure that the Ipe maintains its oils and stability. For low ventilation uses, we recommend finishing deck boards on all four sides prior to installation but after acclimation.
If you're required to glue your Ipe, waterproof adhesives, such as Gorilla brand polyurethane can be applied with adequate results for gluing plugs into deck boards.
Epoxy glues are also very acceptable and can be dyed to black, brown or other colorations to correspond to your Ipe deck. Epoxy produces an especially strong waterproof bond, particularly worthwhile for gluing posts.
For traditional outdoor and uncovered decks.
Standard and pregrooved decking are an ideal option to be installed on both outdoor decks and docks. When fitting outdoor decking be careful to leave a distance between deck boards of 3/32” for air dried material or 1/4” gap for kiln dried material. The difference in gap spacing is to guarantee that the decking has room to expand and contract based on the resources chosen and the natural environment where it is installed.
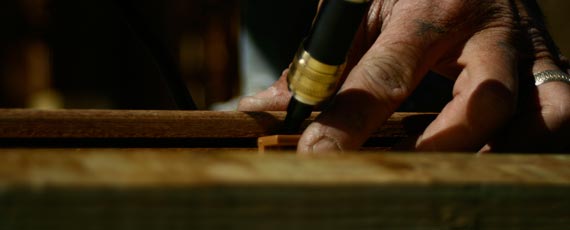
Ipe Clip® Method: The Ipe Clip® system employs exceptional strength plastic clips that fit into slots cut into the edge of the deck board, which then sits on top of a joist. A stainless steel screw is then drilled down into the joist beneath. With the Ipe Clip® system, no screws or holes show from the surface.
Ipe Clip Install Guide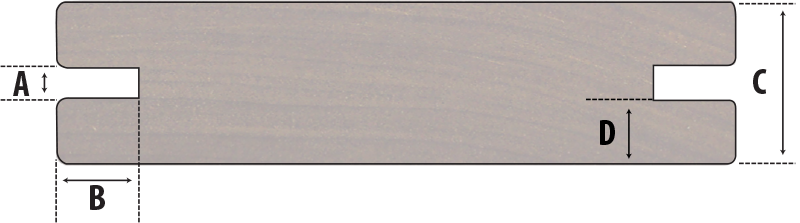
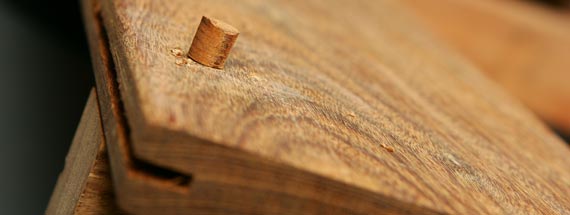
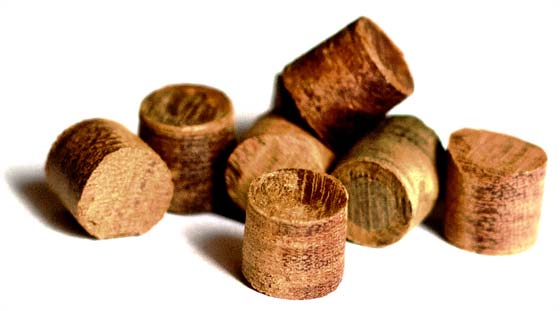
Face Screw & Plug Method: Start by countersinking 3/8" holes into face of deck boards. Predrill 1/8" pilot holes completely through the deck boards. Screw the deck boards down with stainless screws. 3/8" Ipe plugs are then glued into the holes with a waterproof adhesive. After inserted and glued, plugs can then be knocked away with a chisel and sanded smooth with 80 grit sandpaper.
DeckWise® manufactures a line of Hardwood Plugs in the forms of Ipe, Cumaru, Tigerwood, Garapa, & Massaranduba in 3/8" diameter with a small taper. For holes that are not drilled perfectly round, we also manufacture our ribbed Extreme Plugs® in three different sizes (3/8", 10mm, & 12mm).
Finish Screw Method: Stainless steel #7 or #8 trim head screws are screwed into the face of the decking. Advised two per joist. The trim head screw is particularly small and just slightly noticeable.
For use on covered porches, patios, and terraces only.
Enjoy your deck the entire year-round... Decks are no longer just for the summer season! T & G decking is the perfect selection for any covered porch. So forget about only making the most of your deck in the the summer season. Give yourself a deck that you can love at any time of the year. T & G decking has no gap spacing in between the boards after it is installed, comparable to interior hardwood floorings.
T & G decking will need to be fitted straight on top of the floor joists, not on a sub floor as the decking will need cross ventilation underneath it. The material will require to be under cover and have a pitch to allow for drainage. For installation we suggest that you pre drill a hole on a 45-degree angle where the tongue and the face touch, you will see a slight v-groove in this corner. Then, on that same 45-degree angle drive a trim head screw through the pre drilled hole, through the deck board into the floor joist. This sinking action will allow the next deck board to slide into place and will perfectly conceal the previously installed screw head. DeckWise® offers their line of Colormatch trim head screws in three different color options perfect for this application.
You must make contact with your local building section before you set forth designing your project. Your local building sector (and/or Homeowner Association) will notify you of any zoning ordinances and buildings codes that determine where and how you can build. You are accountable for applying for and obtaining any and all required permits for your project.
DeckWise® provides this advise as possible suggestions only and will not be held accountable for your project's viability or should you decide not to acquire the required permits, or if you fall short to comply with all zoning ordinances and building codes.